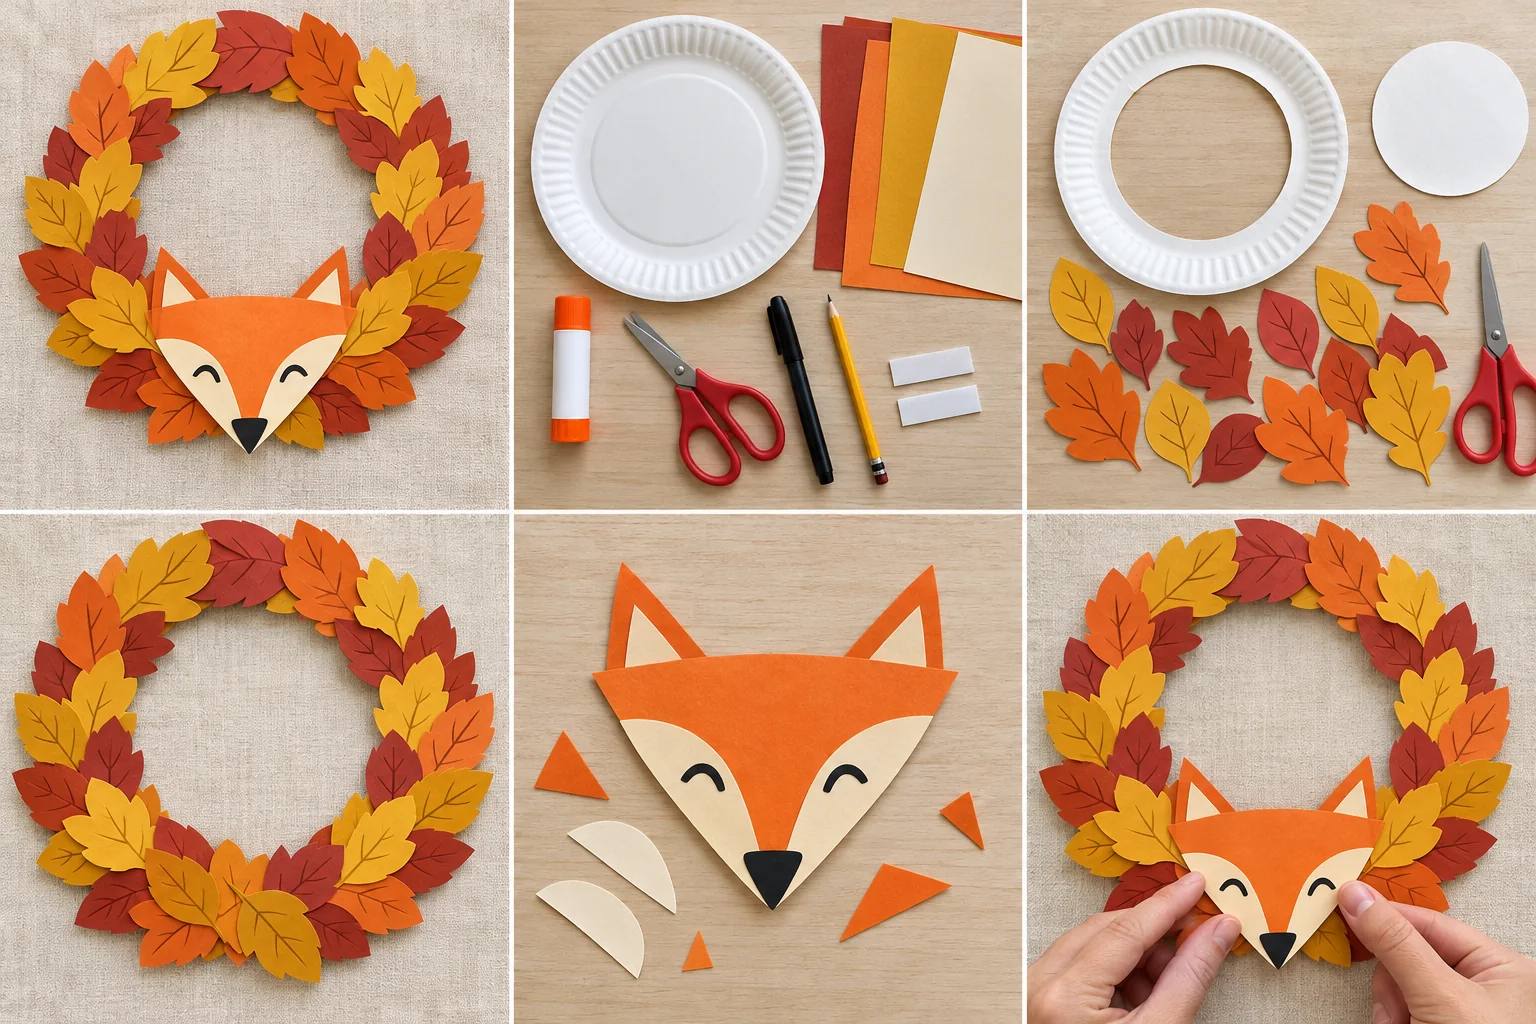
MAKE IT · Woodland Thanksgiving
Woodland fox and leaf paper wreath
Turn a paper plate, autumn-colored leaves, and a friendly paper fox into a woodland welcome for Thanksgiving.
Supplies & steps ↗THANKSGIVING · MAKE SOMETHING WORTH REMEMBERING
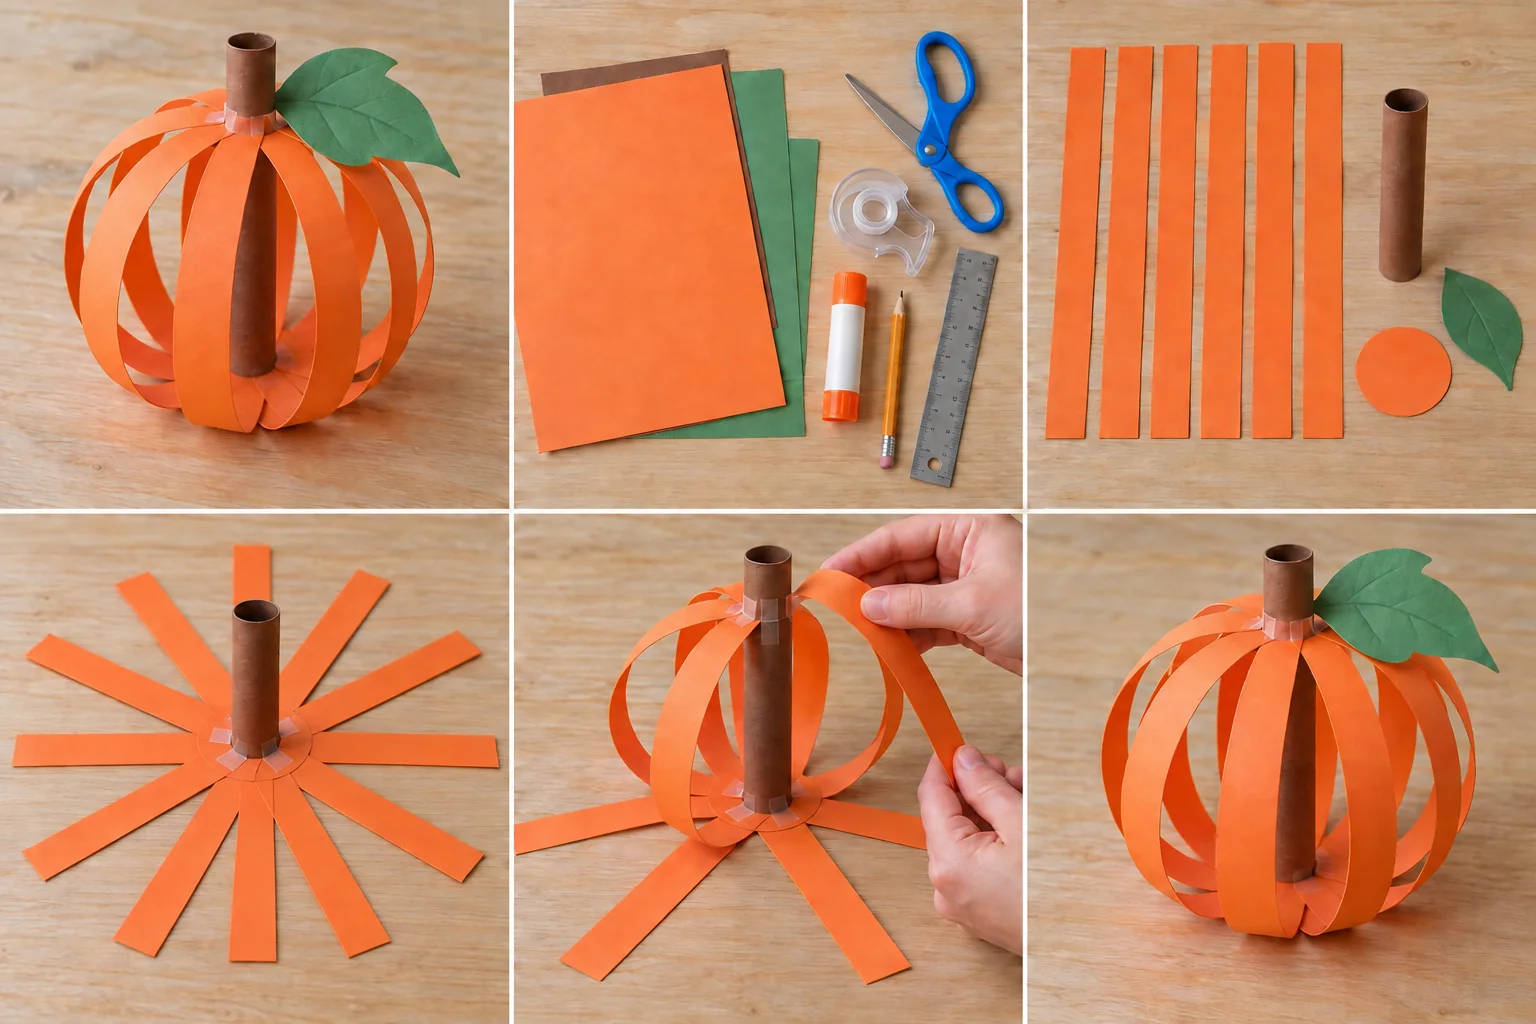
Make a light, open-sided pumpkin from wide paper strips, with a rolled cardstock stem and a big green leaf for your harvest table.
An adult helps measure and cut long strips, steadies the stem, and assists with the tape joins. Allow glue-stick joins to set before shaping; no pins or hot glue are needed.
A LITTLE INSPIRATION
Start with this finished example, then follow the four illustrated steps below. Choose the colors and details that feel like you.
Project and step images are AI-generated illustrations. About our images
Lay the orange strips across one another with all their midpoints together, rotating each strip a little to make an evenly spaced star. Glue the overlapping centers onto the base circle. Stand the brown tube on that center point and use four short tape tabs to anchor its bottom edge to the strips.
Lift both ends of one orange strip so they curve upward on opposite sides of the stem. Tape the ends to the stem about 1 inch below its top, overlapping the ends if needed. Repeat with the remaining strips, keeping their curved ribs evenly spaced. An adult can steady the stem while another maker attaches the ends.
A little help: Keep the tape joins at the same height on the stem so the loops stay balanced. Lift the finished pumpkin by its base, not by the paper ribs.
KEEP THE GOOD TIME GOING
Turn a paper plate, autumn-colored leaves, and a friendly paper fox into a woodland welcome for Thanksgiving.
Supplies & steps ↗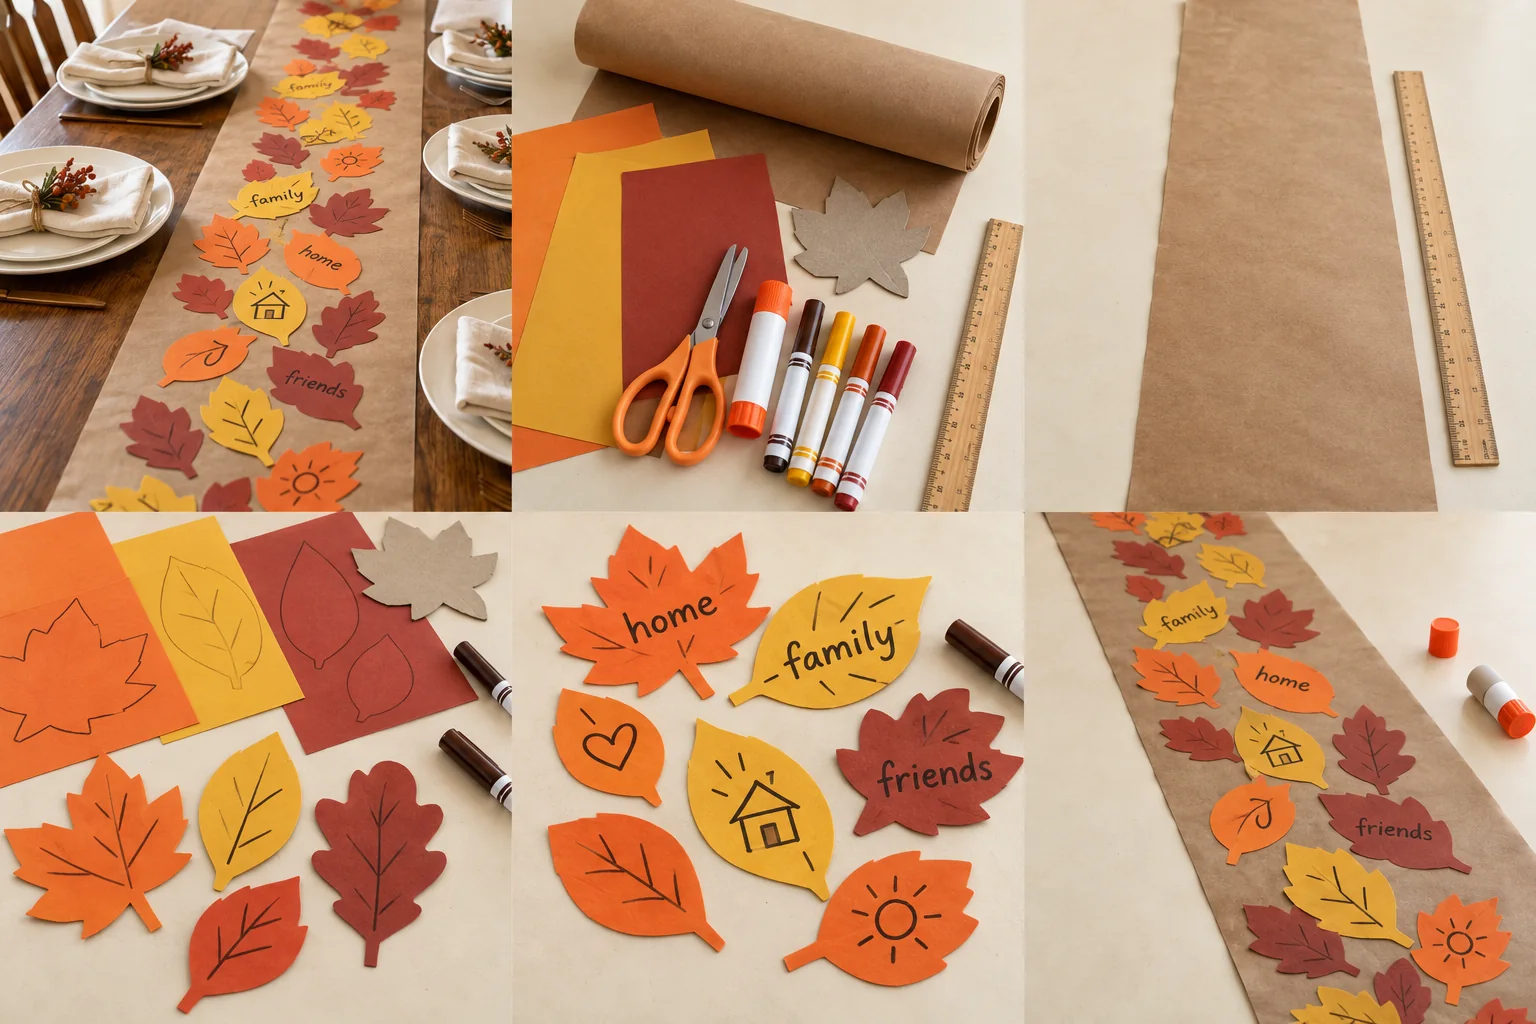
Build a warm Thanksgiving centerpiece from kraft paper and colorful gratitude leaves that everyone can help make.
Supplies & steps ↗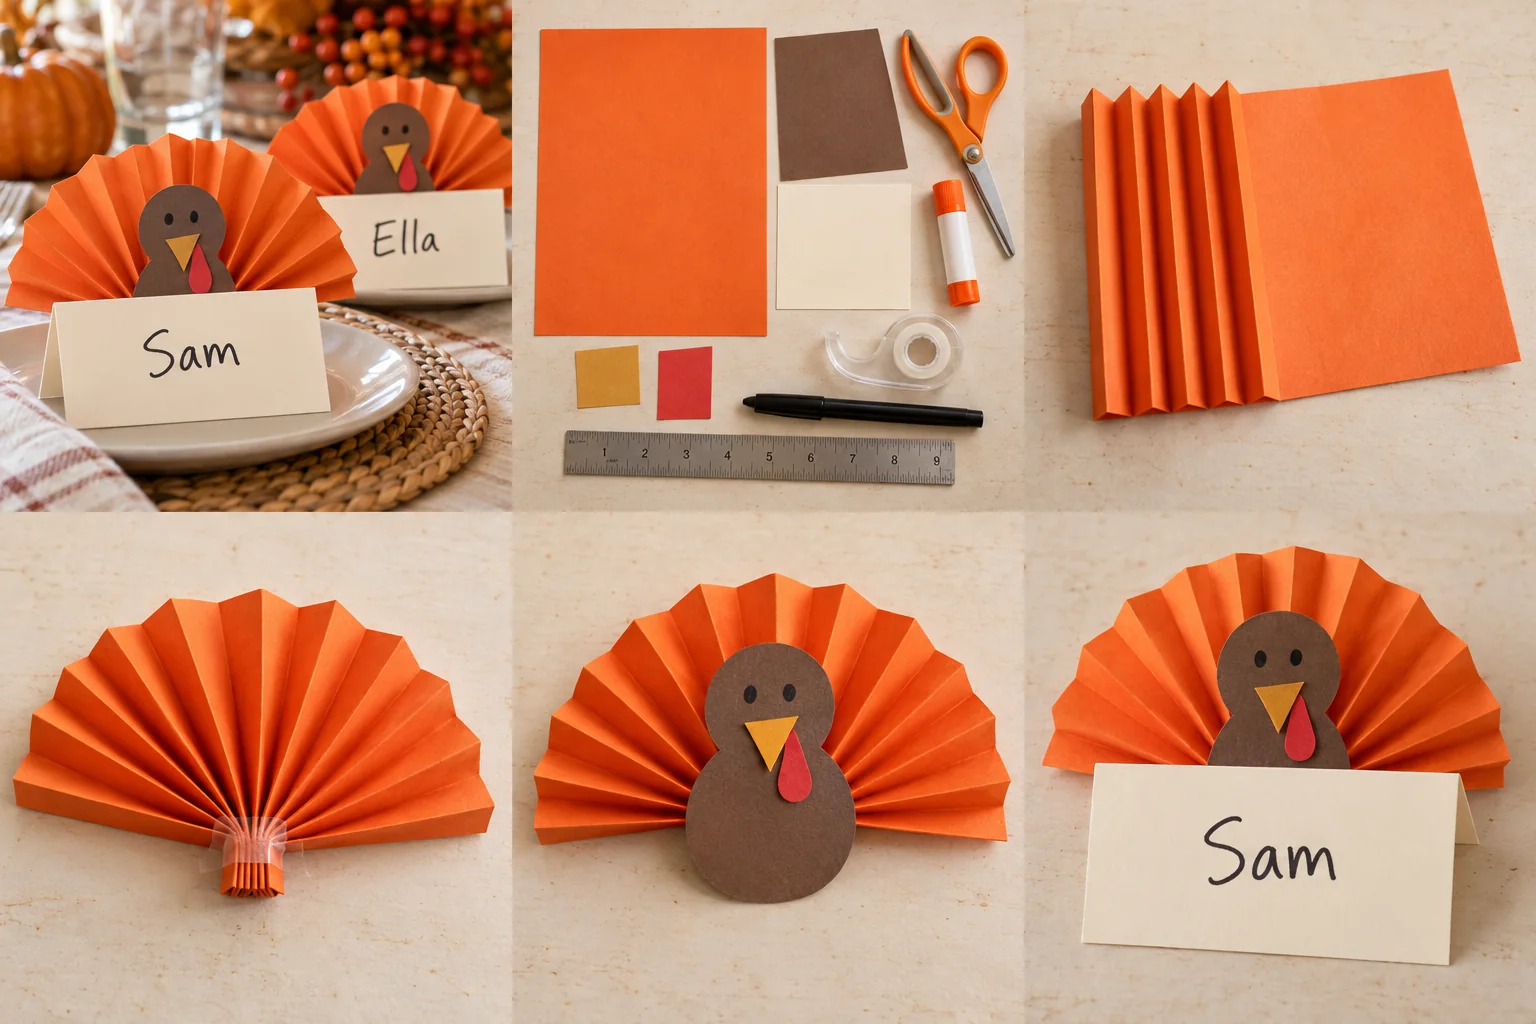
Fold cheerful turkey tails and tuck a place card in front for a Thanksgiving table decoration guests can take home.
Supplies & steps ↗