MAKE IT · Harvest table
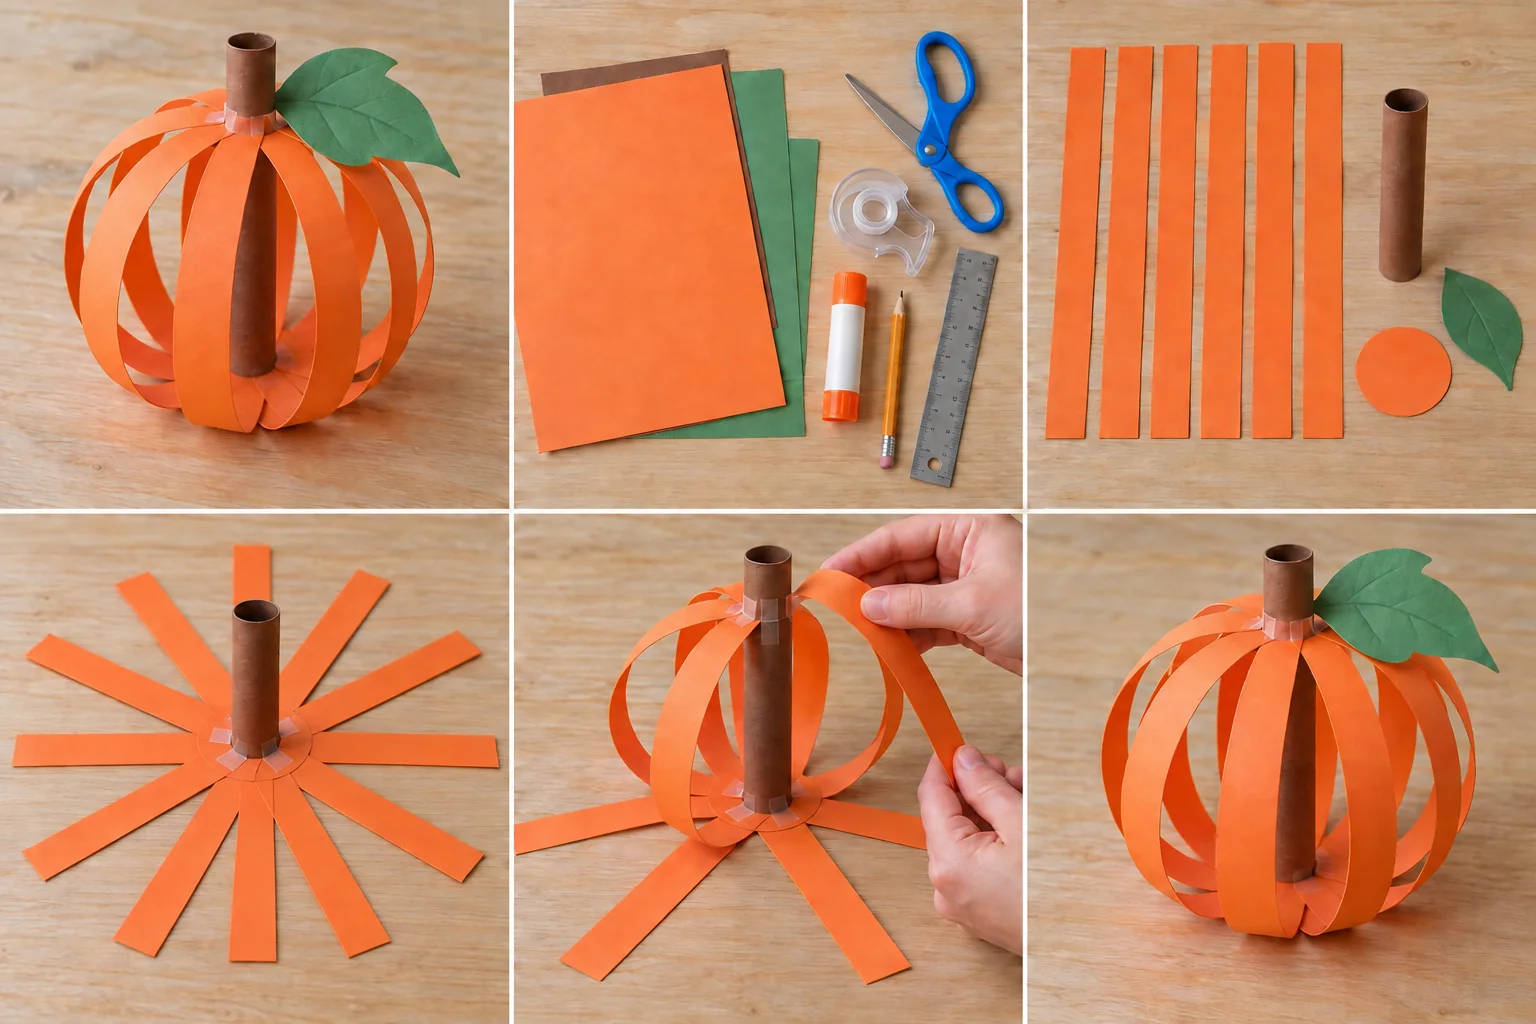
Harvest paper-strip pumpkin centerpiece
Make a light, open-sided pumpkin from wide paper strips, with a rolled cardstock stem and a big green leaf for your harvest table.
Supplies & steps ↗THANKSGIVING · MAKE SOMETHING WORTH REMEMBERING
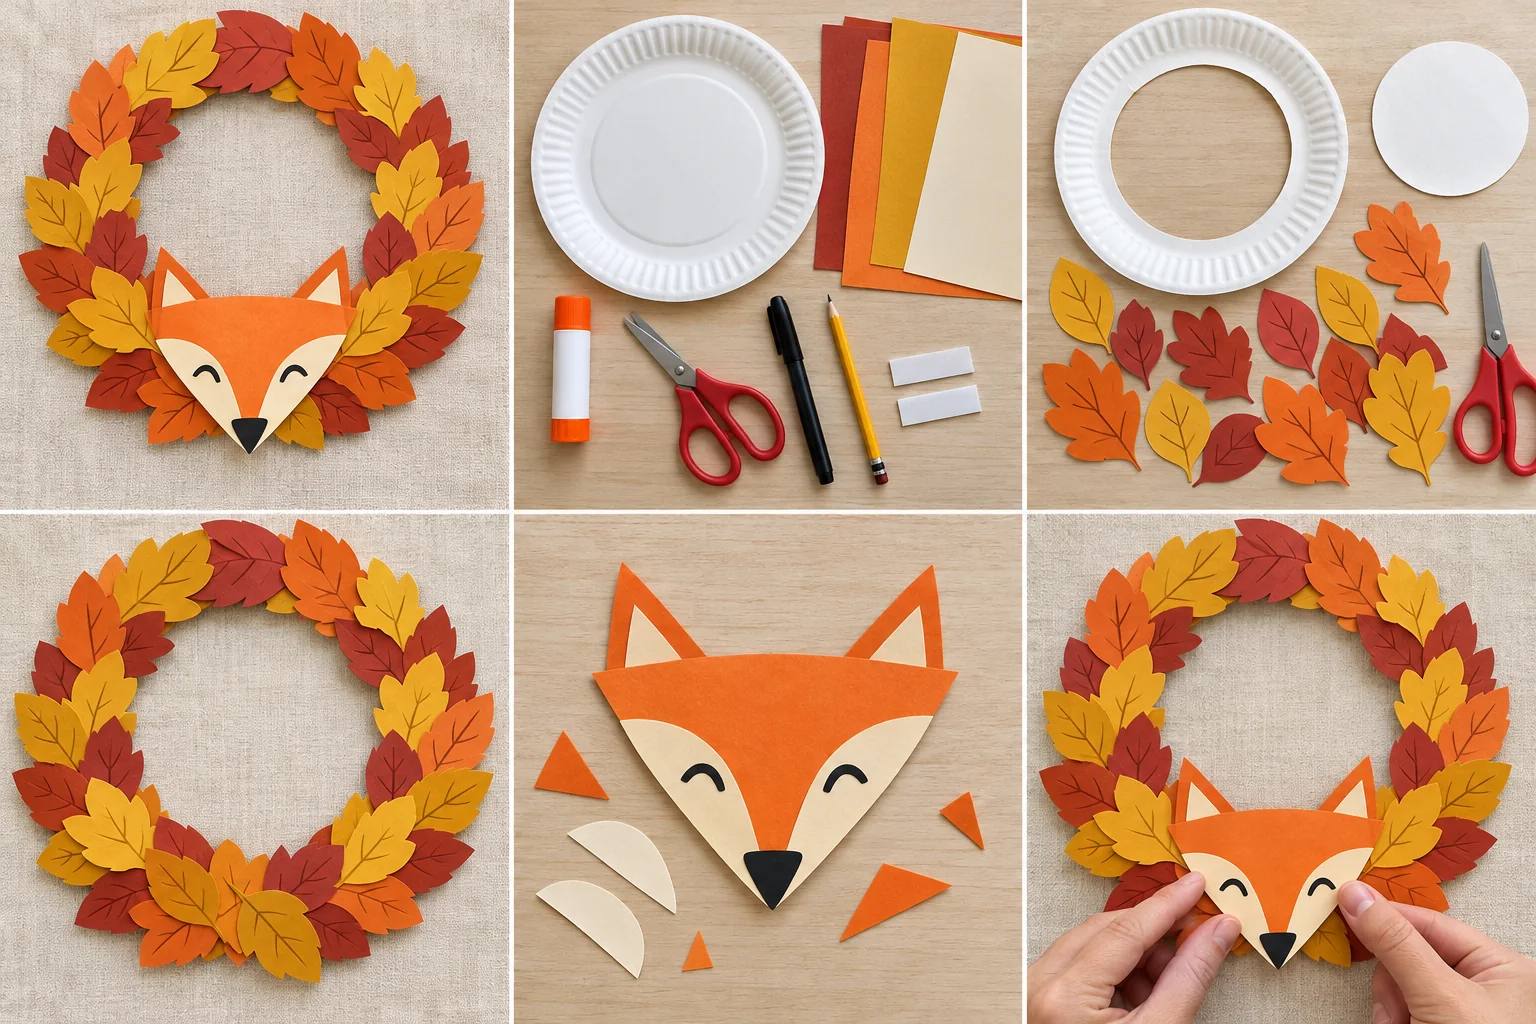
Turn a paper plate, autumn-colored leaves, and a friendly paper fox into a woodland welcome for Thanksgiving.
An adult cuts out the paper-plate center and handles mounting. The 35-minute estimate is hands-on time; allow extra time for school glue to dry according to its label.
A LITTLE INSPIRATION
Start with this finished example, then follow the four illustrated steps below. Choose the colors and details that feel like you.
Project and step images are AI-generated illustrations. About our images
Cut one orange triangle about 4 inches across for the fox face and two smaller orange triangles for ears. Glue the ears behind the two upper corners. Add two cream teardrop-shaped cheeks that meet near the lower point, plus small cream triangles inside the ears if you like; draw two eyes and a black nose with the marker.
A little help: Lay out the fox and leaves before gluing so the center of the wreath remains open.
KEEP THE GOOD TIME GOING
Make a light, open-sided pumpkin from wide paper strips, with a rolled cardstock stem and a big green leaf for your harvest table.
Supplies & steps ↗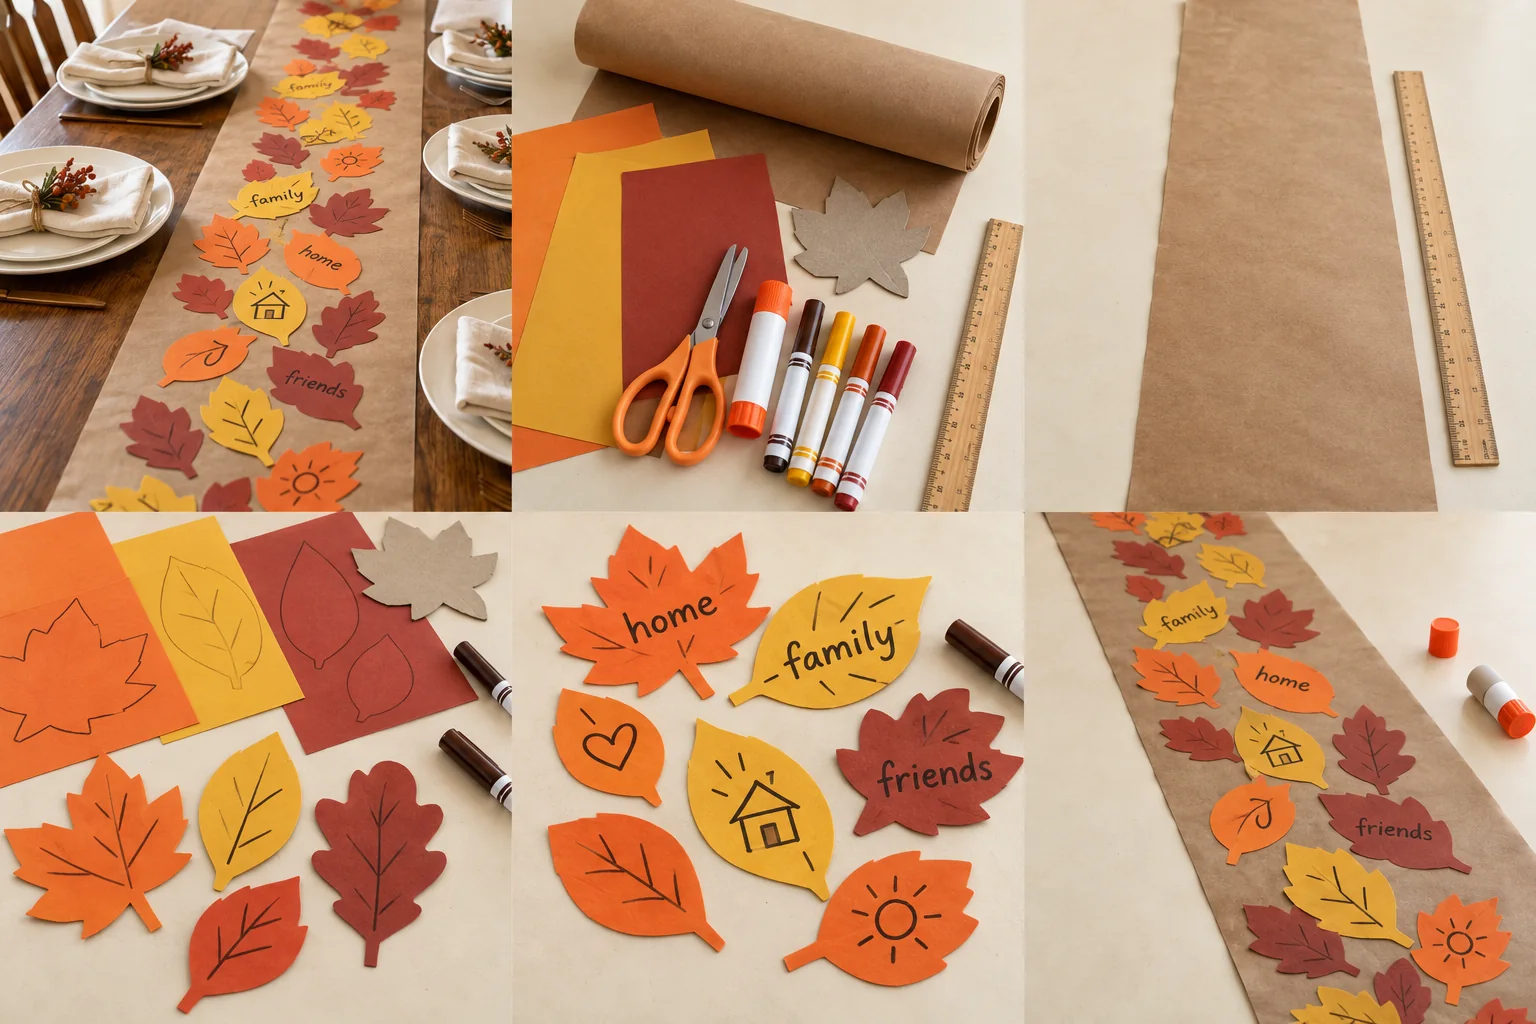
Build a warm Thanksgiving centerpiece from kraft paper and colorful gratitude leaves that everyone can help make.
Supplies & steps ↗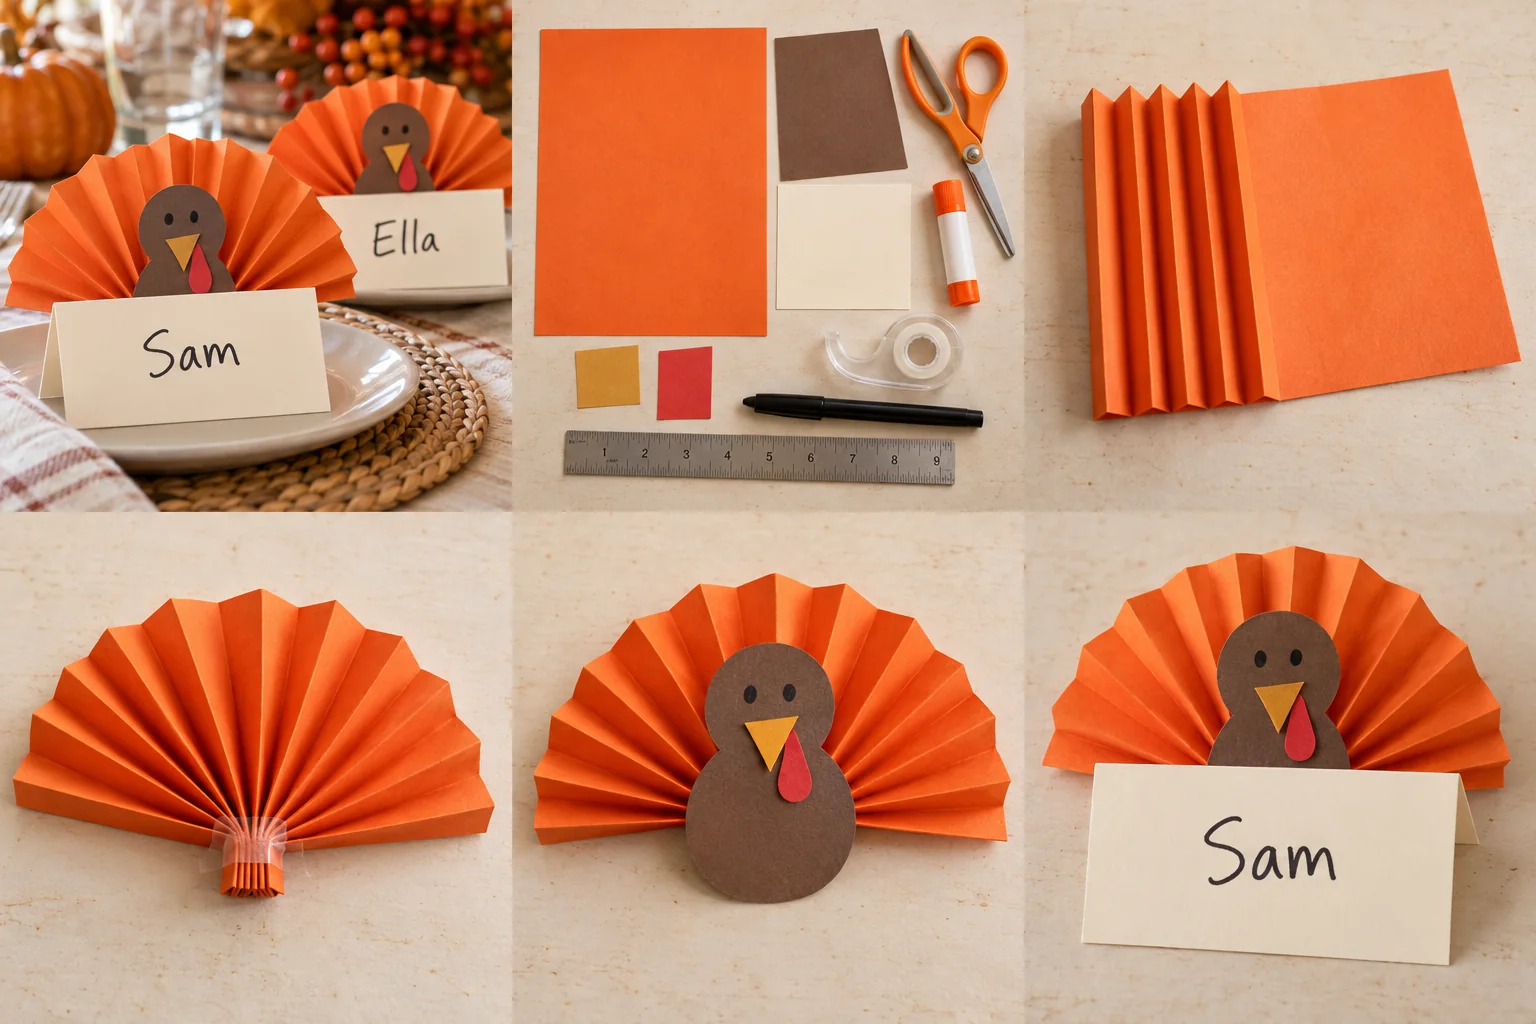
Fold cheerful turkey tails and tuck a place card in front for a Thanksgiving table decoration guests can take home.
Supplies & steps ↗