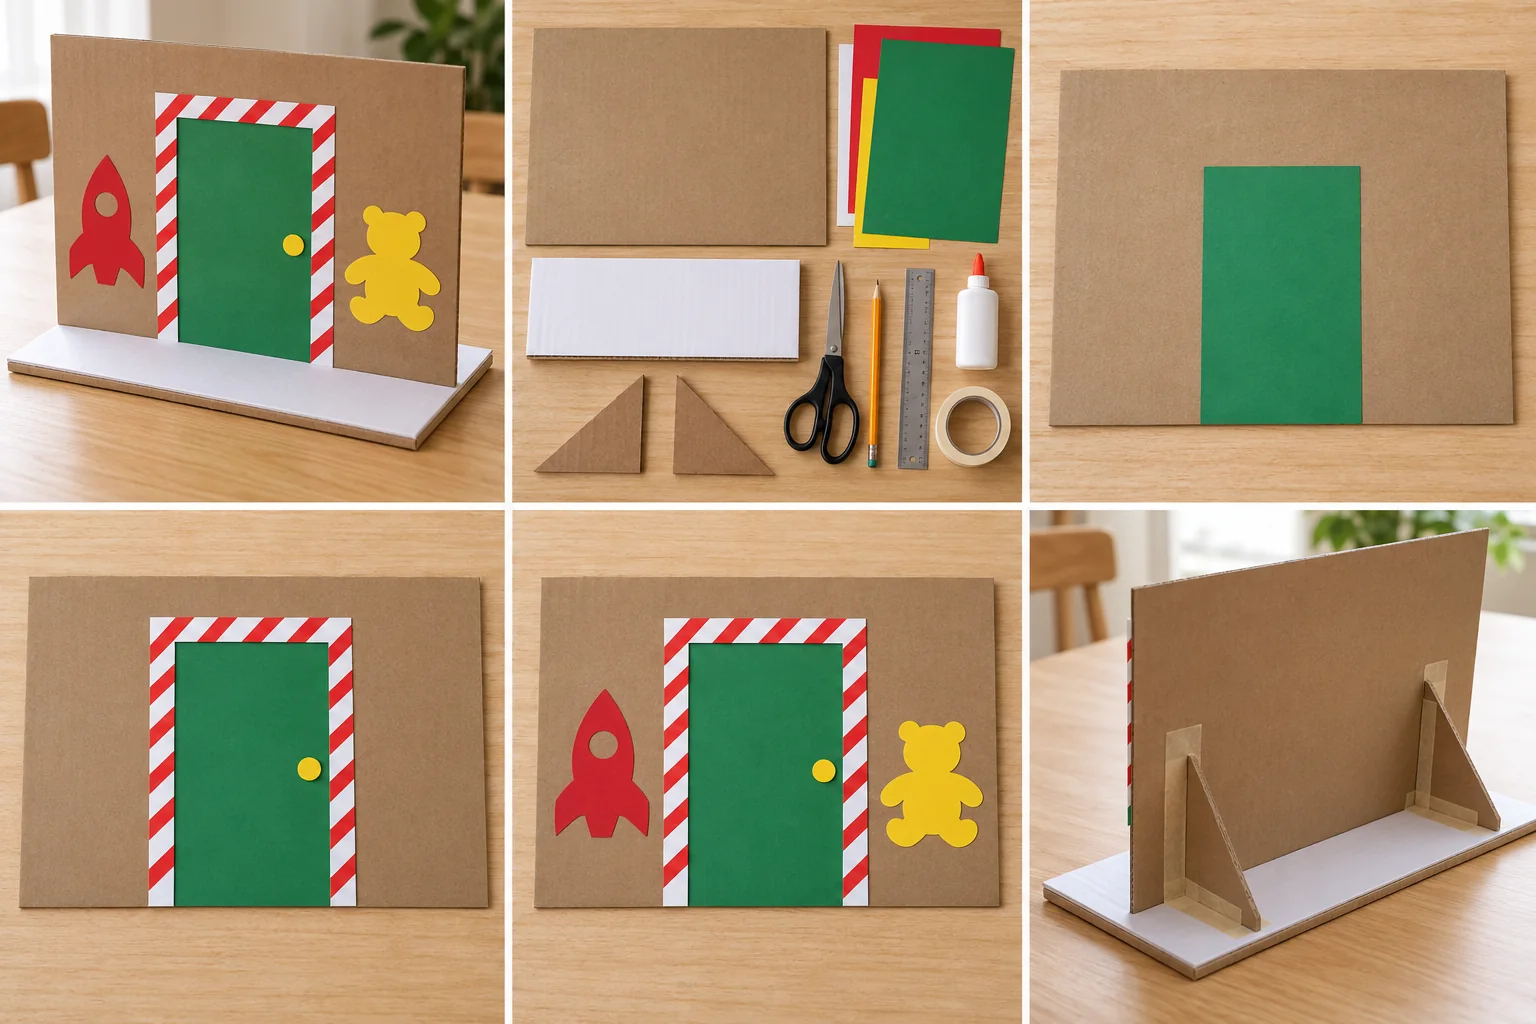
MAKE IT · Santa’s workshop
Santa’s Workshop Cardboard Door
Build a tabletop elf-workshop entrance with a green paper door, a candy-striped frame, and cheerful paper toy shapes beside it.
Supplies & steps ↗CHRISTMAS · MAKE SOMETHING WORTH REMEMBERING
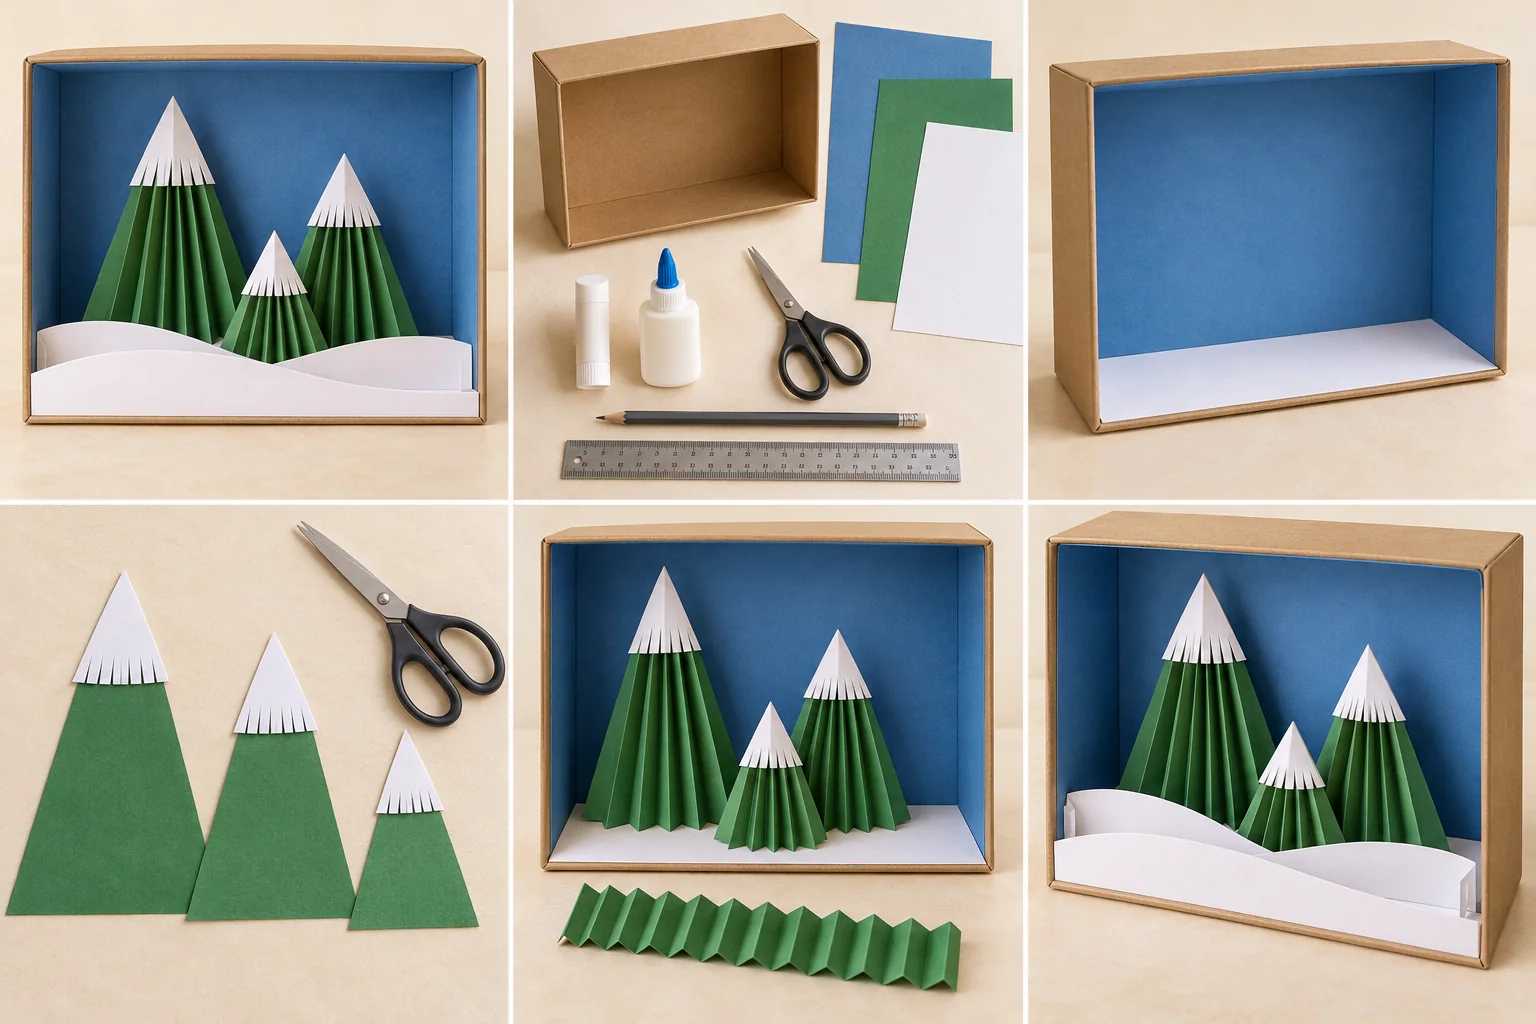
Turn a shoebox into a snowy miniature forest with folded paper fir trees, fringed snow caps, and layered paper drifts.
Allow about 50 minutes of hands-on time plus drying time according to the glue label. An adult should handle any thick-card trimming. This is a paper display; keep it away from candles and heaters.
A LITTLE INSPIRATION
Start with this finished example, then follow the four illustrated steps below. Choose the colors and details that feel like you.
Project and step images are AI-generated illustrations. About our images
Cut three green triangles: roughly 12 cm tall and 10 cm wide, 10 cm tall and 9 cm wide, and 8 cm tall and 8 cm wide. Cut a small white triangle for each snow cap, about one-third of its tree’s height. Make short snips along the white triangle’s bottom edge to form a fringe, leaving the upper section intact. Lay each cap over its matching tree to check the size, then set the caps aside.
Fold each green tree back and forth into narrow fan-shaped pleats, working from one side to the other: start with folds about 1 cm wide at the bottom edge and angle them toward the top point. Open the pleats slightly so the straight bottom forms a zigzag that can stand. Glue a white snow cap onto the front of each tree’s tip. Place taller trees toward the back of the box, add small dots of craft glue under their bottom folds, and hold them upright while they catch.
Cut two white strips a little narrower than the box opening and about 5 cm tall. Make each top edge a gentle snowdrift curve. Fold the bottom 1 cm of each strip backward to make a foot. Glue one strip in front of the trees and the second near the front edge, keeping part of every tree visible. Let the scene dry flat before moving it.
A little help: Test each tree on the tabletop first. Open the bottom pleats wider if it leans, and avoid pulling the folds completely flat.
KEEP THE GOOD TIME GOING
Build a tabletop elf-workshop entrance with a green paper door, a candy-striped frame, and cheerful paper toy shapes beside it.
Supplies & steps ↗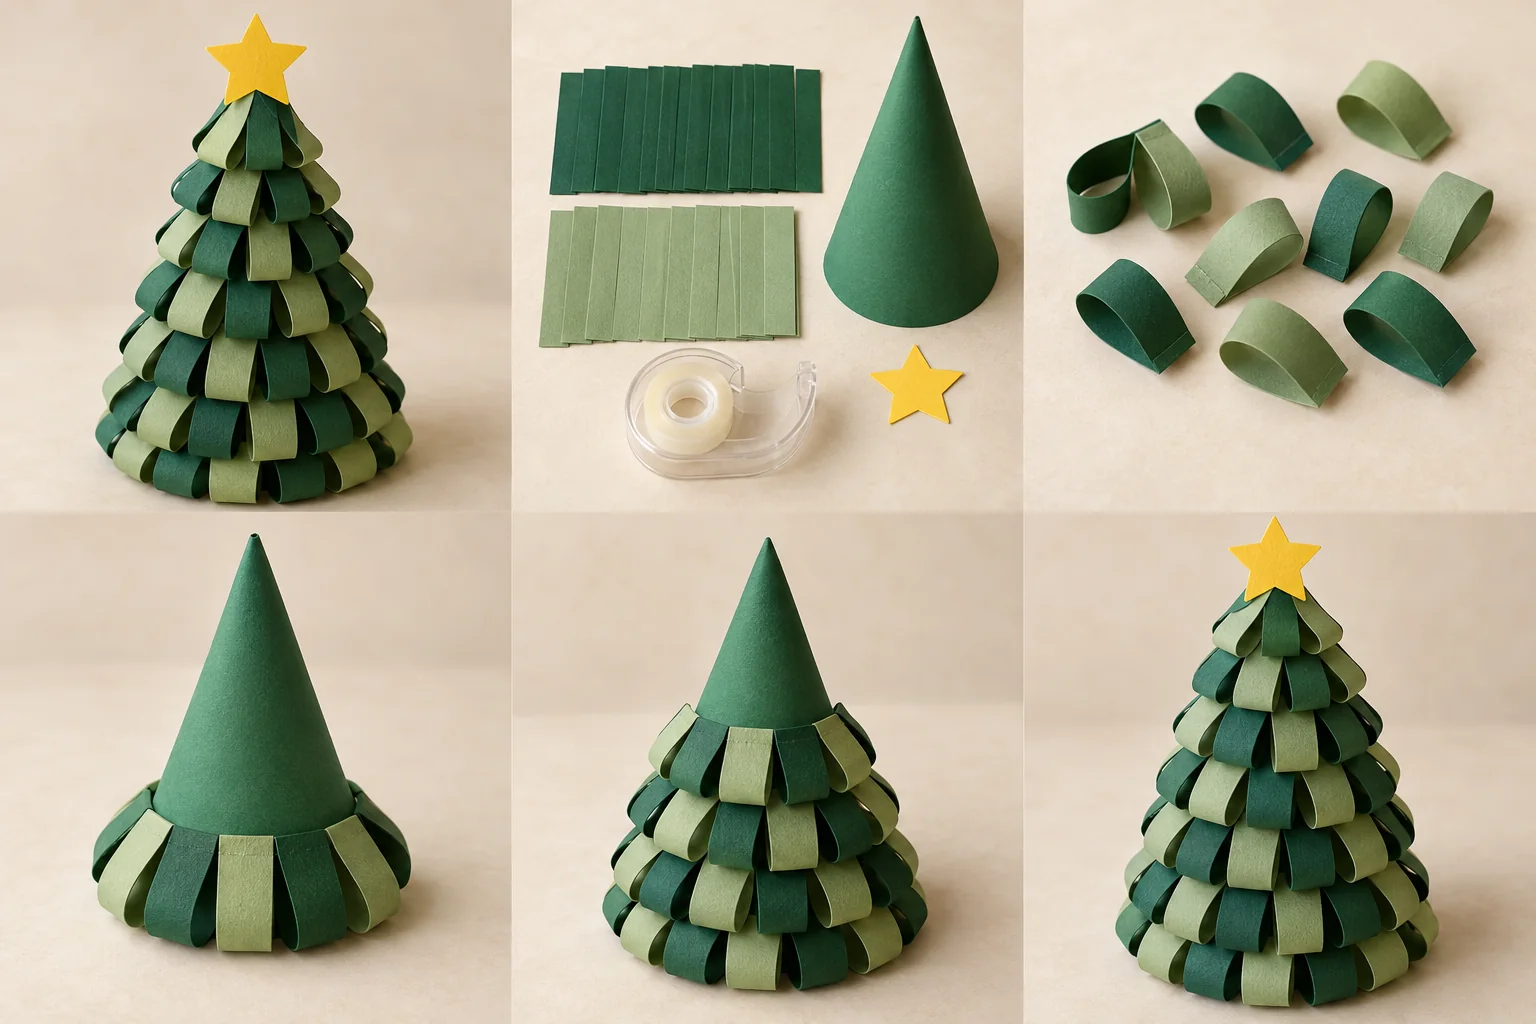
Build a soft-looking tabletop tree from rows of green paper loops and a sturdy cardstock cone.
Supplies & steps ↗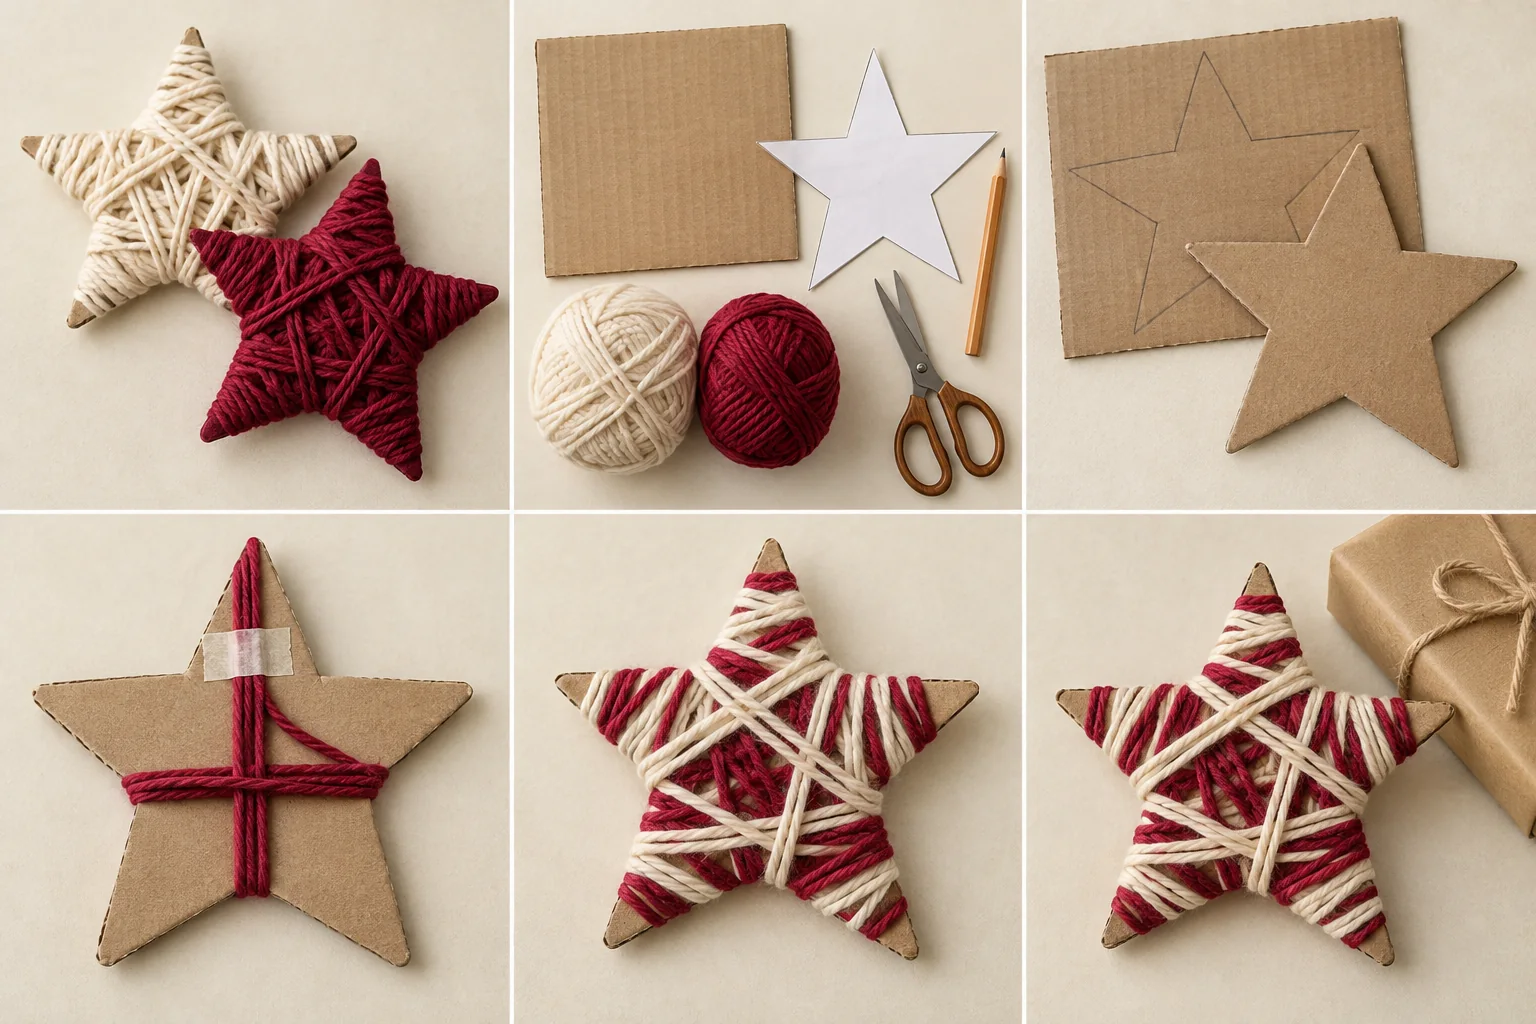
Wrap chunky stars in soft yarn to make a colorful shelf display or large paper gift toppers.
Supplies & steps ↗